1. Body Wash
Probable causes:
– Drilling under extremely abrasive conditions
– Overwhelming flushing volume
Suggested actions:
– Reduce flushing volume
– Slow drill rotation to create larger cuttings for more effective flushing
– Use drilling foam to assist in the removal of rock cuttings
– Regularly clean the drill holes
2. Skirt Wring Off
Probable causes:
– Misalignment due to hole deviation
– Improper feed pressure
– Steel fatigue
– Worn, broken, or mismatched threads
– Excessive rotational forces from operating with dull carbides
Suggested actions:
– Lower percussion and feed during the initial drilling (collaring)
– Use alignment tools and improve drilling practices for a straighter hole; Use bits with a drop center face design and/or a retract body
– Regularly sharpen dull carbides
– Avoid striking the external bit body
– Reduce the power of impacts
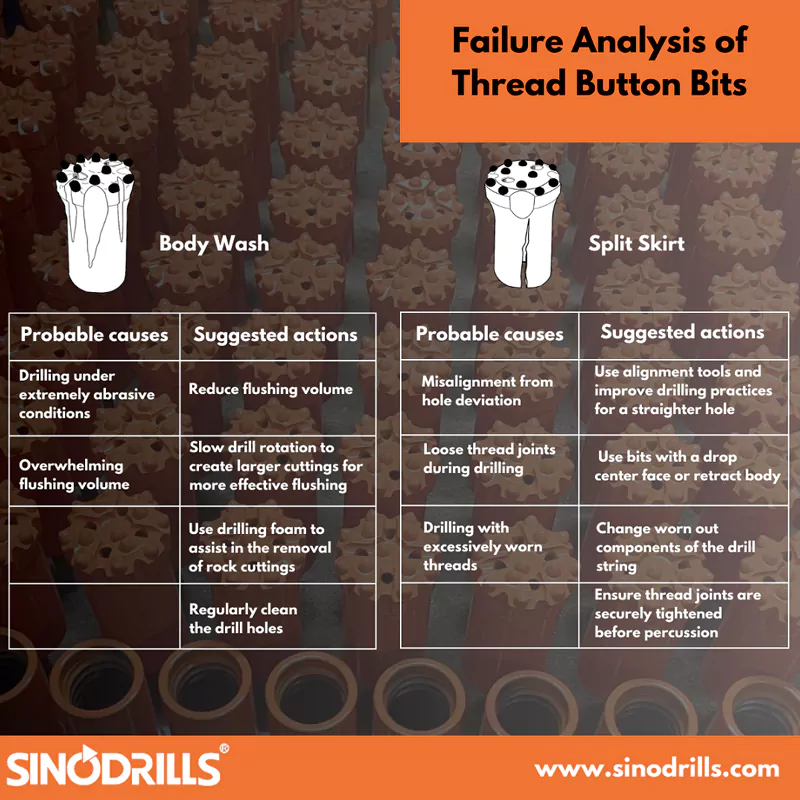
3. Split Skirt
Probable causes:
– Misalignment from hole deviation
– Loose thread joints during drilling
– Drilling with excessively worn threads
Suggested actions:
– Use alignment tools and improve drilling practices for a straighter hole
– Use bits with a drop center face or retract body
– Change worn out components of the drill string
– Ensure thread joints are securely tightened before percussion
4. Steel Crack on Bit Face
Probable causes:
– Excessive feed force
– Use dull carbides for drilling
– Manufacturing error, inferior button hole-drilling precision
Suggested actions:
– Adjust feed force to match rock conditions
– Regularly sharpen dull carbides
– Return bit for detailed analysis

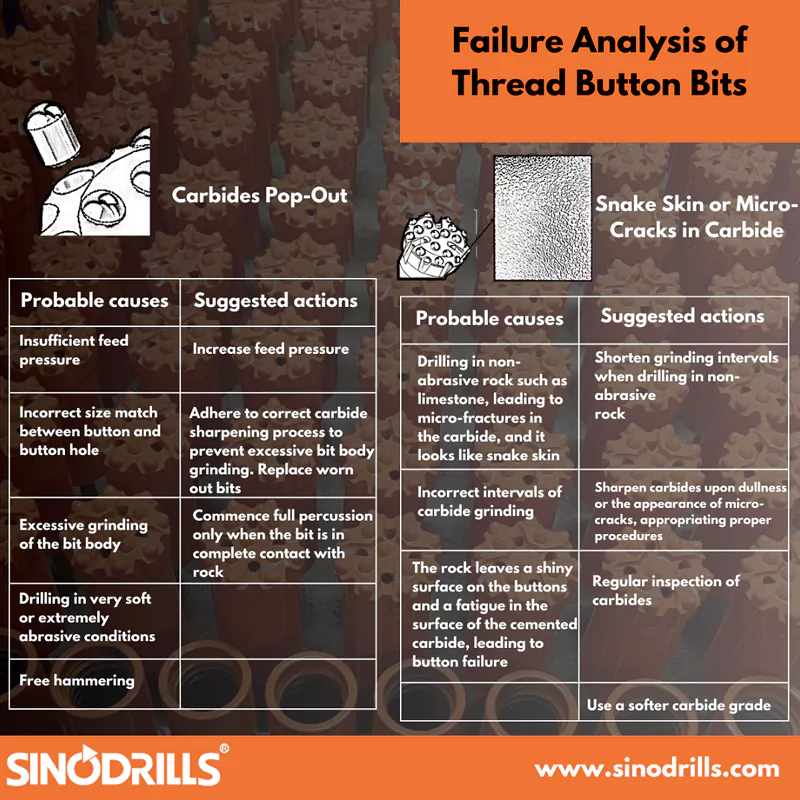
5. Carbides Pop-Out
Probable causes:
– Insufficient feed pressure
– Incorrect size match between button and button hole
– Excessive grinding of the bit body
– Drilling in very soft or extremely abrasive conditions
– Free hammering
Suggested actions:
– Increase feed pressure
– Adhere to correct carbide sharpening process to prevent excessive bit body grinding. Replace worn out bits.
– Commence full percussion only when the bit is in complete contact with rock
6. Snake Skin or Micro-Cracks in Carbide
Probable causes:
– Drilling in non-abrasive rock such as limestone, leading to micro-fractures in the carbide, and it looks like snake skin.
– Incorrect intervals of carbide grinding
– The rock leaves a shiny surface on the buttons and a fatigue in the surface of the cemented carbide, leading to button failure
Suggested actions:
– Shorten grinding intervals when drilling in non-abrasive
rock
– Sharpen carbides upon dullness or the appearance of micro-cracks, appropriating proper procedures
– Regular inspection of carbides
– Use a softer carbide grade
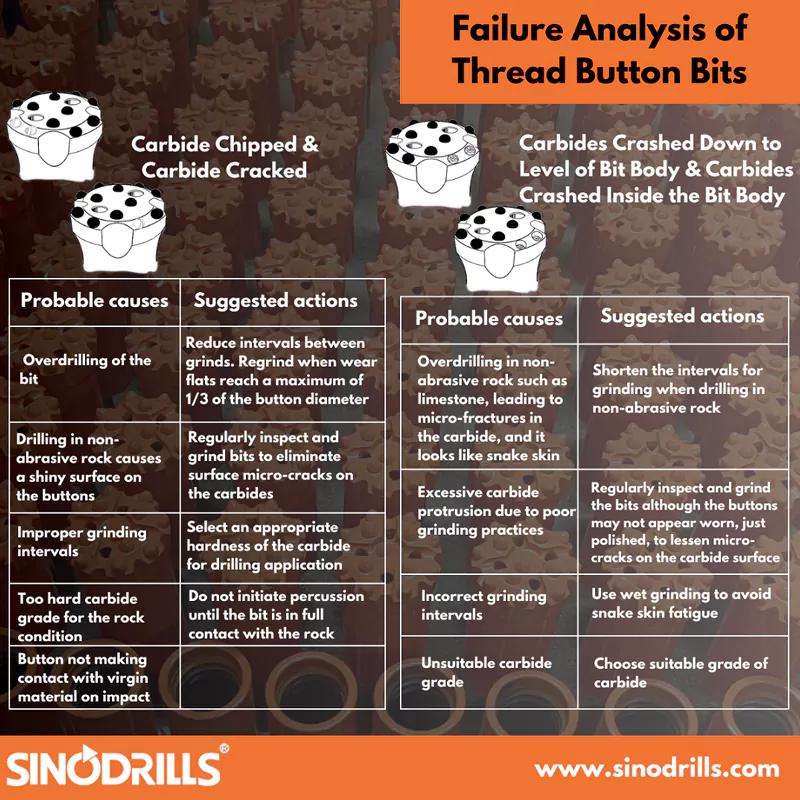
7. Carbide Chipped & Carbide Cracked
Probable causes:
– Overdrilling of the bit
– Drilling in non-abrasive rock causes a shiny surface on the buttons
– Improper grinding intervals
– Too hard carbide grade for the rock condition
– Button not making contact with virgin material on impact
Suggested actions:
– Reduce intervals between grinds. Regrind when wear flats reach a maximum of 1/3 of the button diameter
– Regularly inspect and grind bits to eliminate surface micro-cracks on the carbides
– Select an appropriate hardness of the carbide for drilling application
– Do not initiate percussion until the bit is in full contact with the rock
8. Carbides Crashed Down to Level of Bit Body & Carbides Crashed Inside the Bit Body
Probable causes:
– Overdrilling in non-abrasive rock such as limestone, leading to micro-fractures in the carbide, and it looks like snake skin.
– Excessive carbide protrusion due to poor grinding practices
– Incorrect grinding intervals
– Unsuitable carbide grade
Suggested actions:
– Shorten the intervals for grinding when drilling in non-abrasive rock
– Regularly inspect and grind the bits although the buttons may not appear worn, just polished, to lessen micro-cracks on the carbide surface
– Use wet grinding to avoid snake skin fatigue
– Choose suitable grade of carbide