Unlocking a sustainable water source right on your land can feel like a dream. Imagine the independence and self-sufficiency that comes with having your own well. This guide walks you through the essential steps involved in the process, offering insights into how you can tap into the earth’s hidden resource and secure a reliable water supply for your property.
Embarking on the journey of drilling a well requires careful planning and execution. From understanding your property’s potential to navigating the practicalities of drilling, this exploration will illuminate the key considerations and stages. Let’s delve into the world beneath our feet and discover the path to accessing your own private water.
How to Drill a Well
Embarking on the journey of drilling your own well requires meticulous preparation and a clear understanding of each phase involved. This comprehensive guide breaks down the essential steps, offering insights into the considerations, tools, planning, and execution necessary to successfully access groundwater on your property. From initial groundwork to final procedures, each stage plays a crucial role in establishing a sustainable water source.
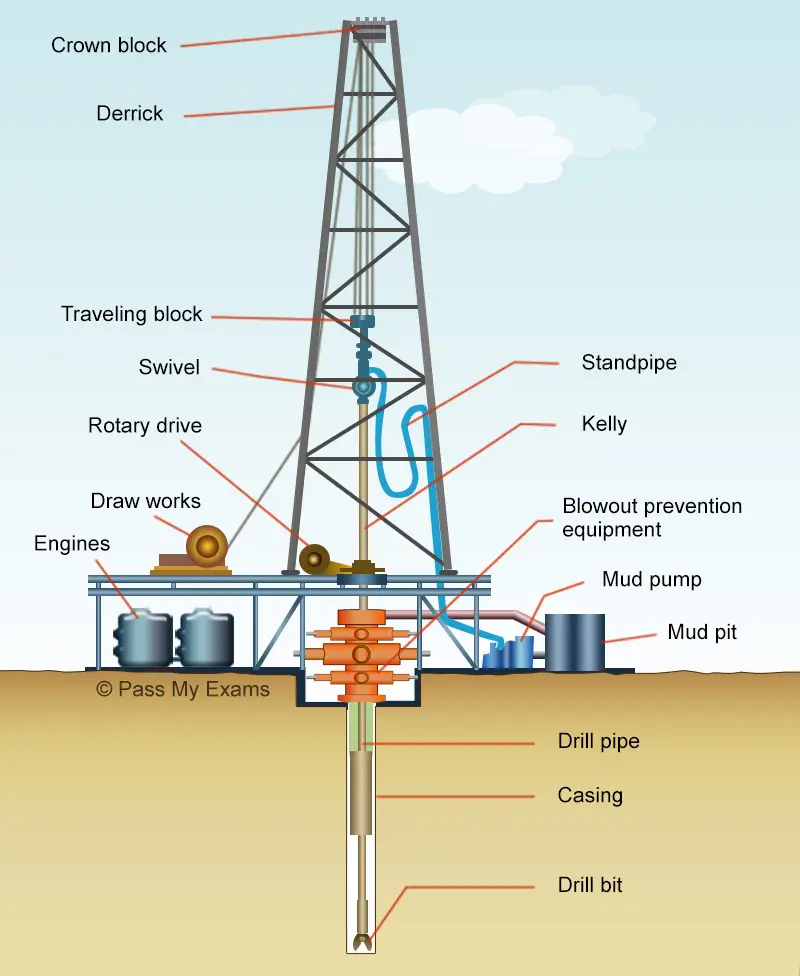
Well Drilling Tools Needed
Well drilling necessitates a specialized array of tools and equipment designed to bore through various subsurface materials and establish a functional water well.
The selection of specific tools depends on factors such as the drilling method employed (e.g., rotary, cable tool), the geological conditions encountered, and the desired well diameter and depth. These tools must be robust and durable to withstand the demanding conditions of drilling, ensuring efficiency and safety throughout the process.
Recommended Drill Bits and Rods for Well Drilling


- Drill Bits: Various types (e.g., tricone roller bits, drag bits) designed to cut through different soil and rock formations.
- Drill Pipe: Hollow steel pipes that transmit rotational force and drilling fluid to the drill bit.
- Drilling Rig: The main machinery that provides power to rotate the drill string and lift cuttings.
- Casing: Steel or PVC pipes used to line the well bore, prevent collapse, and maintain well integrity.
- Well Screen: A filtering device installed at the water-bearing zone to allow water entry while preventing sediment from entering the well.
- Drilling Fluid (Mud): A mixture pumped down the drill pipe to lubricate the bit, carry cuttings to the surface, and stabilize the well bore.
- Pump: Submersible or jet pumps used to extract water from the completed well.
- Safety Gear: Essential equipment like helmets, gloves, and eye protection to ensure worker safety during the drilling operation.
Step 1: Initial Thoughts Before Drilling
Before turning any soil, several crucial factors demand your attention. You must first investigate local regulations and obtain the necessary permits to ensure your drilling project complies with all legal requirements. Additionally, assessing your property’s geological conditions, including soil type and potential water table depth, is vital for informed decision-making and predicting the feasibility of your well.
Understanding these preliminary aspects will lay a solid foundation for your well-drilling endeavor. Failing to address permits can lead to legal complications, while ignoring geological factors can result in wasted effort and resources. Thorough research and due diligence at this stage are indispensable for a successful outcome.
Step 2: Assembling Necessary Equipment and Supplies
The success of your well-drilling project hinges on having the right tools and materials readily available. This includes the drill rig itself, drill bits suitable for your soil type, casing pipes to line the well, and a pump to extract the water. Furthermore, you’ll need safety gear to protect yourself during the drilling process, as well as measuring tools to monitor depth and alignment.
Acquiring high-quality equipment and ensuring you have all the necessary supplies will contribute significantly to the efficiency and safety of your operation. Investing in durable tools can prevent breakdowns and ensure a smoother drilling experience. Careful inventory and preparation in this phase will minimize delays and potential hazards.
Step 3: Blueprinting and Strategizing Your Well
Careful well design and planning are critical steps in ensuring a functional and sustainable water source. This involves determining the optimal well depth based on your geological assessment and water needs. Selecting the appropriate diameter for the well casing and choosing the right type of well screen to filter water are also essential considerations.
A well-thought-out plan will guide the entire drilling process and help you anticipate potential challenges. Considering factors like water demand and the geological characteristics of your property will influence the design choices you make. Thorough planning at this stage will maximize the well’s efficiency and longevity.
Step 4: Preparing the Drilling Location
Before the drilling rig arrives, the chosen site needs proper preparation. This involves clearing the area of any obstacles, such as vegetation or debris, and ensuring a level surface for the rig setup. Establishing access for equipment and creating a safe working environment are also key aspects of site preparation.
A well-prepared site not only facilitates the drilling process but also enhances safety for everyone involved. Clearing the area prevents potential hazards and ensures the drilling rig can operate efficiently. Taking the time to properly prepare the location will contribute to a smoother and safer drilling experience.
Step 5: Setting Up and Operating the Drill Rig
The setup and operation of the drill rig require precision and adherence to safety protocols. This involves carefully positioning and stabilizing the rig according to the manufacturer’s instructions. Understanding the rig’s controls and operational procedures is crucial for safe and effective drilling.
Proper rig setup ensures stability and accuracy during the drilling process. Operating the machinery correctly, with a focus on safety, is paramount to prevent accidents and equipment damage. Familiarizing yourself with the drill rig’s capabilities and limitations is essential for a successful drilling operation.
Step 6: The Actual Drilling Work
The drilling process itself involves carefully advancing the drill bit into the ground, gradually creating the well bore. This requires monitoring the drilling progress, managing the drill speed and pressure, and periodically removing cuttings (drilled material) from the hole. Observing changes in the soil composition as you drill can also provide valuable information about the subsurface.
Consistent and careful drilling is essential for creating a straight and stable well bore. Managing drilling parameters and clearing cuttings efficiently will prevent the bit from getting stuck and ensure continuous progress. Paying attention to the geological formations encountered during drilling can inform decisions about well depth and screen placement.
Step 7: Enhancing Water Flow in the Well
Well development is a crucial step to optimize water flow into the well. This typically involves methods like surging or airlifting, which help to remove fine sediments and drilling debris from the well bore and the surrounding aquifer. Proper well development ensures a cleaner water supply and improves the well’s long-term yield.
Effective well development is vital for maximizing the productivity of your well. Removing residual drilling materials and stimulating the aquifer around the well screen allows for a more efficient flow of water. Investing time and effort in this stage will result in a more reliable and higher-yielding water source.
Step 8: Finalizing the Well and Installing Components
Well completion involves installing the permanent well casing and screen, as well as creating a sanitary seal to prevent surface contamination. The pump is then installed to extract water from the well. Proper installation of these components is essential for the well’s functionality and the safety of your water supply.
Careful well completion and pump installation are critical for ensuring a safe and reliable water system. The casing provides structural integrity, the screen allows water entry while filtering out sediment, and the sanitary seal prevents pollutants from entering the well. Correct installation is crucial for the long-term performance and safety of your well.
Step 9: Procedures After Drilling is Complete
Following the completion of drilling and installation, post-drilling procedures are necessary to ensure the well’s safety and usability. This includes testing the water quality to ensure it meets potability standards and developing a regular maintenance schedule to prolong the well’s lifespan and maintain water quality.
Post-drilling steps are essential for verifying the safety and longevity of your new well. Water quality testing protects your health, while regular maintenance helps prevent issues and ensures a continuous supply of clean water. These final procedures are crucial for the long-term success of your well.
How to Drill a Well for Irrigation?
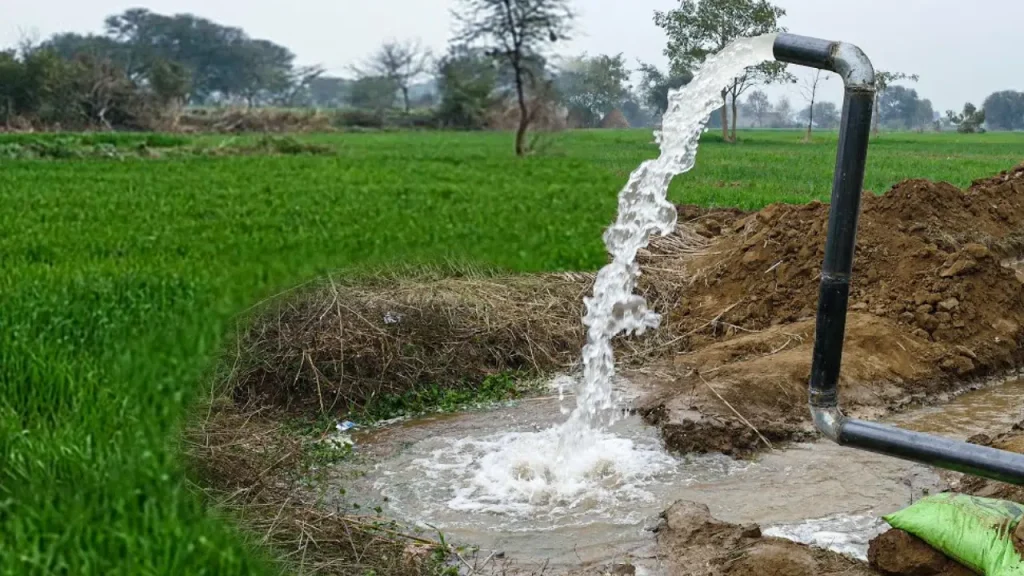
Drilling an irrigation well can provide a reliable and independent water source for your agricultural needs. This process involves several key steps, from initial planning to final well development.
Step 1: Site Selection and Planning
Before drilling, carefully select a suitable site. Consider factors like proximity to irrigation areas, geological conditions, and accessibility for drilling equipment. Research local regulations and obtain necessary permits.
Conduct a hydrogeological survey to determine the depth and quality of the groundwater. This step helps in estimating drilling costs and the potential yield of the well, ensuring an efficient and sustainable water supply.
Step 2: Drilling the Borehole
Choose an appropriate drilling method based on the geological formation of your site, such as rotary, cable tool, or auger drilling. Prepare the drilling rig and necessary equipment, including drill bits, casing, and drilling fluid.
Begin drilling, carefully monitoring the process for changes in geological strata and groundwater presence. Maintain proper drilling fluid circulation to stabilize the borehole and remove cuttings, ensuring a clean and stable excavation.
Step 3: Well Casing and Screen Installation
Once the desired depth is reached and a suitable aquifer is found, install well casing to prevent the borehole from collapsing. The casing also isolates different water-bearing zones and prevents contamination.
Install a well screen at the aquifer level to allow water to enter the well while keeping out sand and gravel. The slot size of the screen should be chosen based on the aquifer’s sediment size for optimal water flow.
Step 4: Well Development
After casing and screen installation, develop the well to remove fine sediments and improve water flow into the well. This can be done through surging, pumping, or airlifting to clear the screen and surrounding aquifer.
Well development increases the well’s efficiency and longevity by maximizing its yield and minimizing sediment entry. Proper development ensures a consistent supply of clean water for your irrigation system.
Well Drilling Methods
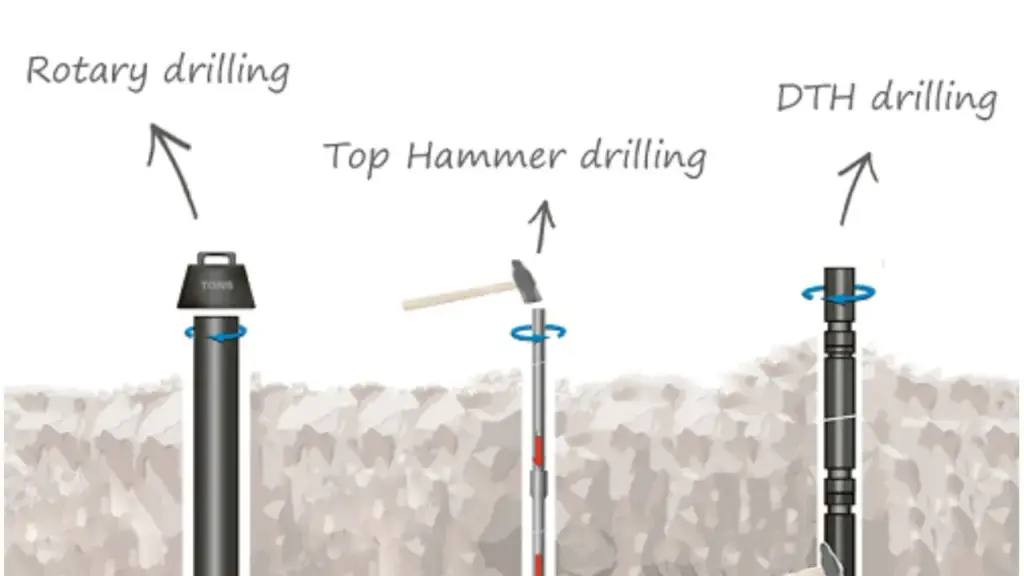
Well drilling employs various drilling methods to create a borehole and access underground water resources, each suited to different geological conditions and well depths. The selection of a drilling method is a critical decision that impacts the efficiency, cost, and success of the well.
Common techniques include rotary drilling, which uses a rotating drill bit to cut through the earth, and cable tool drilling (also known as percussion drilling), an older method that involves repeatedly lifting and dropping a heavy drill bit to crush rock and soil. Other specialized drilling methods like auger drilling are used for shallower wells in softer formations, while air rotary and reverse circulation drilling offer different ways to manage drilling fluids and cuttings removal.
- Rotary Drilling: This widely used method employs a rotating drill bit attached to a drill pipe to bore into the ground. Drilling fluid (mud or air) is circulated to lubricate the bit and carry cuttings to the surface. Rotary drilling is versatile and efficient for a range of soil and rock types and can achieve significant depths.
- Cable Tool Drilling: An older technique where a heavy drill bit is repeatedly raised and dropped on a cable to fracture the subsurface. The crushed material (cuttings) is periodically removed using a bailer. While slower than rotary methods, it’s effective in various formations and doesn’t require drilling fluids, making it suitable in certain situations.
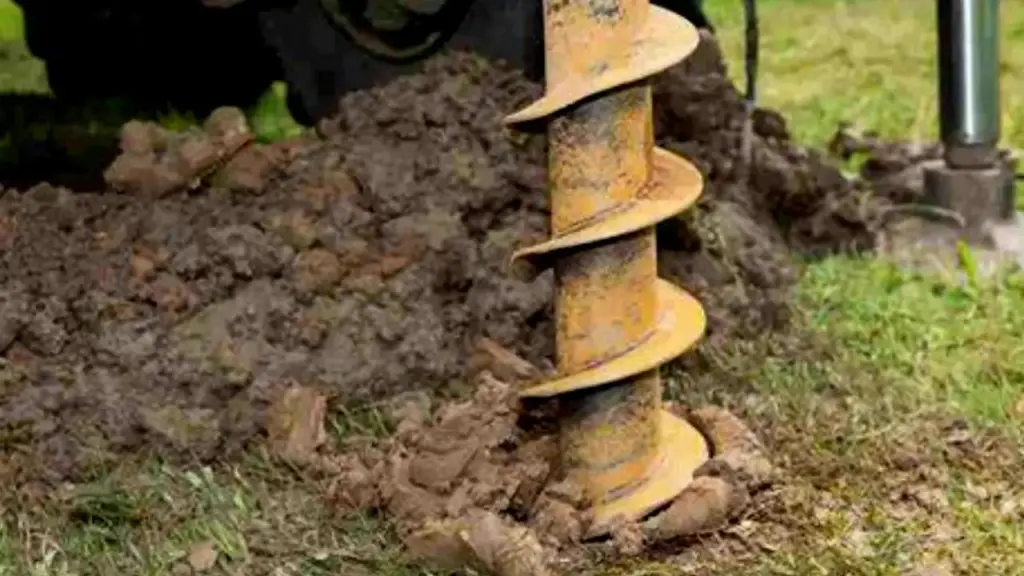
- Auger Drilling: This method uses a helical screw (auger) to bore shallow holes, typically in softer, unconsolidated materials. It’s a relatively simple and cost-effective technique for shallow wells or soil sampling but is limited in depth and the types of formations it can penetrate.
- Air Rotary Drilling: Similar to mud rotary drilling, but uses compressed air instead of drilling mud to lift cuttings. This method is often preferred in hard rock formations where air can provide faster penetration rates and doesn’t require the management of drilling mud.
- Reverse Circulation Drilling: In this technique, drilling fluid is pumped down the annulus (space between the drill pipe and the borehole) and returns to the surface through the drill pipe, carrying cuttings with it. This method is often used for large-diameter wells and can be effective in unconsolidated formations.
How Deep to Drill a Water Well
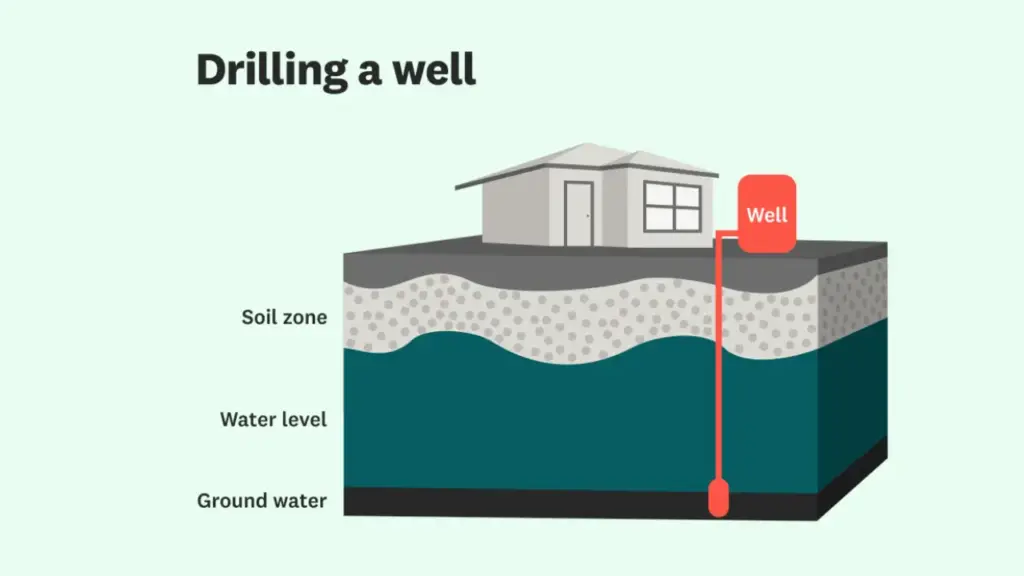
The depth to which you need to drill a water well is a critical decision with no one-size-fits-all answer. It depends heavily on local hydrogeology, the depth of usable aquifers, and your specific water needs.
Generally, wells need to penetrate well below the water table to ensure a consistent supply, even during dry periods. While some shallow wells (less than 100 feet) exist, residential wells often range from 100 to 800 feet deep, and in some cases can exceed 1,000 feet to reach reliable water sources.
| Factor | Description | Impact on Well Depth |
| Local Water Table Depth | The level below which the ground is saturated with water. Varies seasonally and geographically. | Well must extend significantly below the lowest seasonal water table level to ensure a consistent supply. |
| Geological Conditions | The type of soil and rock formations present. Different materials have varying permeability and water-bearing capacity. | Determines the depth at which usable aquifers are located. Hard rock may require deeper drilling to find fractured zones containing water. |
| Water Quality | The presence of contaminants or undesirable minerals at different depths. Deeper aquifers are often better protected but can have more minerals. | May necessitate drilling to a specific depth to access the best quality water source available, balancing purity with potential mineral content. |
| Water Demand | The amount of water required for household use, irrigation, or other purposes. | Higher demand may necessitate accessing more productive aquifers, which could be deeper. |
| Well Regulations | Local and state regulations regarding minimum well depth and construction to protect groundwater resources. | Drilling must comply with these regulations, which often aim to ensure water safety and prevent well interference. |
How Do Well Drillers Know Where to Drill
Well drillers utilize a combination of scientific knowledge, historical data, and on-site investigation to determine the optimal location for drilling a water well. They often begin by reviewing geological surveys and maps of the area, which provide insights into subsurface formations and potential aquifer locations. Examining existing well logs from nearby properties can offer valuable information about water table depths and well yields in the vicinity.
On-site, drillers may conduct tests like soil percolation tests to understand water absorption rates and look for surface indicators such as vegetation types and topography that can suggest the presence of groundwater.
- Geological Surveys and Maps: These resources provide a broad understanding of the underground rock layers and potential water-bearing formations in a region, helping to narrow down promising areas.
- Existing Well Logs: Records from previously drilled wells in the vicinity offer direct data on water depth, yield, and the geological formations encountered, providing valuable localized insights.
- Soil Percolation Tests: These tests assess how quickly water drains through the soil, indicating the soil’s permeability and its potential to transmit water to an aquifer.
- Surface Indicators: Experienced drillers observe natural clues like the types of plants growing (some thrive in moist conditions) and the shape of the land (low-lying areas can indicate groundwater accumulation).
How Much Does It Cost to Drill a Well
The cost to drill a well can vary significantly based on several factors, making it difficult to provide a precise figure. Generally, you can expect to pay anywhere from $1,500 to $12,000, with the national average hovering around $5,500. However, this is just a broad estimate, and your actual costs could be higher or lower depending on the specifics of your project.
Several key elements influence the final price tag of drilling a well. These include the depth of the well required to reach a sustainable water source, the geological conditions of your property (such as soil type and the presence of rock), and the diameter and material of the well casing. Additionally, the cost of labor in your area, permit fees, and the complexity of the well system installation (including the pump and any necessary plumbing) will all contribute to the overall expense.
- Well Depth and Casing: Deeper wells necessitate more drilling time and materials, increasing costs. The type and amount of casing used to line the well bore also significantly impact the price, with steel casing generally being more expensive than PVC. Expect to pay more per foot for deeper wells and wider casings.
- Geographical Location and Soil Conditions: Drilling costs can vary widely depending on your location due to differences in labor costs, local regulations, and the difficulty of drilling through the ground. Rocky or compacted soils often require specialized equipment and more labor, leading to higher expenses compared to drilling in softer soils like sand or clay.
- Well System Components and Additional Services: The total cost will also encompass the installation of the well pump, pressure tank, and any necessary piping and electrical work to connect the well to your water system. Furthermore, services like water quality testing and site preparation can add to the overall expense of the well drilling project.
How Long Does It Take to Drill a Well
The time it takes to drill a well is not a fixed duration and is influenced by a variety of factors. The actual drilling process can often be completed relatively quickly, sometimes within a few days. However, the entire project timeline, from initial assessments to having a usable well, can span from a week to several weeks, depending on the complexities involved.
Several elements contribute to the variability in well drilling time. The depth of the well significantly impacts the duration, as deeper wells naturally require more time to drill. Geological conditions, such as the type of soil and the presence of hard rock formations, can either expedite or slow down the drilling process. The specific drilling method and the capabilities of the drilling equipment being used also play a crucial role in the overall timeline.
- Drilling Depth and Ground Conditions: Shallower wells in easily penetrable soil will take less time to drill compared to deep wells encountering dense rock. Drillers typically estimate drilling progress based on feet per day, which varies greatly with subsurface materials. Expect longer timelines for areas with challenging geological compositions.
- Drilling Method and Equipment: The choice of drilling technique, such as rotary or cable tool drilling, affects the speed. Modern, powerful drilling rigs can generally drill faster than older or less efficient equipment. The availability and efficiency of the drilling team also contribute to the overall time taken for the drilling phase.
- Pre- and Post-Drilling Procedures: Before drilling commences, time is needed for site surveys, permit acquisition, and equipment mobilization. After drilling, well development, pump installation, and water quality testing add to the total project time. These essential steps ensure the well’s functionality and safety, extending the overall timeline beyond just the drilling itself.
How Close Can You Drill a Well to Another Well
The minimum distance you can drill a well from another well is not a universal standard and is heavily influenced by local regulations and geological factors. These regulations are put in place primarily to prevent well interference, where the pumping of one well can lower the water level in a nearby well, reducing its yield or even causing it to run dry. Additionally, proper spacing helps to minimize the risk of cross-contamination between the wells, ensuring the water quality of both remains safe.
Many states and local jurisdictions have specific well spacing requirements outlined in their water well construction codes. These regulations often consider factors such as the type of well (domestic vs. non-domestic), the expected pumping rate, and the characteristics of the aquifer. It’s crucial to consult your local health department or water resources agency to understand the specific rules in your area before commencing any well drilling activities. Failing to adhere to these regulations can result in penalties or the need to relocate the well.
- Preventing Well Interference: Adequate spacing ensures that the drawdown zone (the area where the water table is lowered due to pumping) of one well does not significantly impact the water level and yield of a neighboring well. The necessary distance depends on aquifer characteristics like permeability and storage capacity. Closer wells can lead to reduced water availability for both.
- Minimizing Contamination Risks: Proper separation helps to avoid the migration of contaminants from one well to another. This is particularly important if one of the wells is not properly sealed or if there are potential sources of pollution nearby. Greater distances provide more natural filtration through the soil layers, reducing the risk of shared contamination.
- Local Regulations and Permits: Before drilling, always check with your local authorities for specific well spacing requirements. Permit applications often require information about existing wells on the property and neighboring properties to ensure compliance with these rules. Setback distances from property lines and potential sources of contamination (like septic systems) are also typically mandated.
Conclusion
Drilling a well is a significant undertaking, demanding careful planning and execution to secure a reliable water source. The step-by-step process, from surveying to testing, highlights the complexity involved in accessing groundwater. While this guide provides essential information, remember that local regulations and geological conditions vary, necessitating professional consultation.
For those equipped to handle well drilling, sourcing quality tools is paramount. Our drilling tool factory offers a comprehensive range of wholesale drilling tools designed for efficiency and durability. Investing in reliable equipment ensures a smoother drilling process and a longer-lasting well.
Ultimately, whether you choose to DIY or hire professionals, understanding the intricacies of well drilling and having access to dependable tools are key to successfully tapping into the valuable resource beneath your property.